This is the second in our series of articles on the latest capabilities of HyperScale X. If you missed the first covering what’s new in HyperScale X in 2022E, catch up on that here.
Click on the images (figures) throughout to enlarge them.
We've come a long way since someone typed "./setupsds" for the first time to launch the text based installer to configure Hyperscale, with a few twists and turns along the way. From the first manual drive selection and network configuration, Hyperscale setup and configuration was primarily CLI driven, requiring higher levels of Linux expertise than we wanted our customers, PS, and the field to worry about.
As part of our effort to automate bring more simplicity, we are incredibly happy to bring to the product a completely re-designed HSX installer. Driven entirely through the IPMI interface, it's 100% GUI driven using a single command. No network config is required other than IPMI before beginning setup, greatly simplifying the effort and time required to complete an install.
After logging in with the default credentials, users simply need to type "hsxsetup" from the default directory (Figure 1). This command launches an X-Term graphical installer, guiding the user through the rest of the install. Node discovery and management is handled through the Electron and node.js framework. Let's go take a look…

The new installer has quite a few big-ticket items in terms of new features, most of which you will see right out the gate. You'll also notice general under-the-cover changes to bring more consistency with the look and feel of Command Center. This is something you'll notice throughout the installer, small changes that improve quality of life just "make sense" within the context of Commvault and our look and feel.
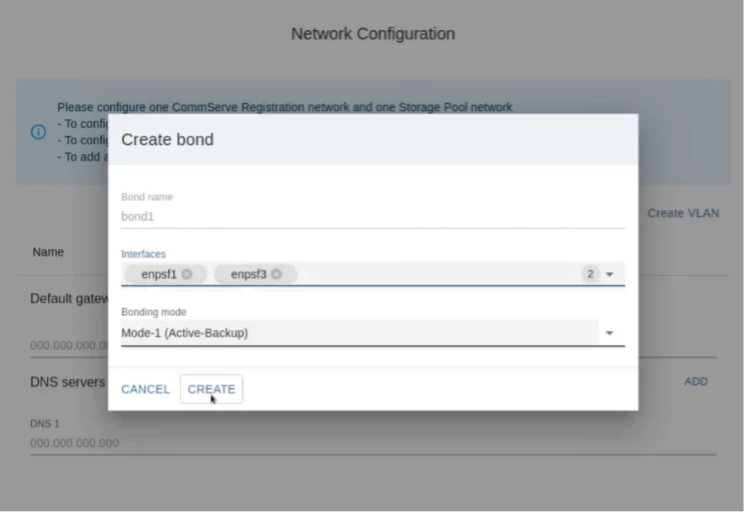
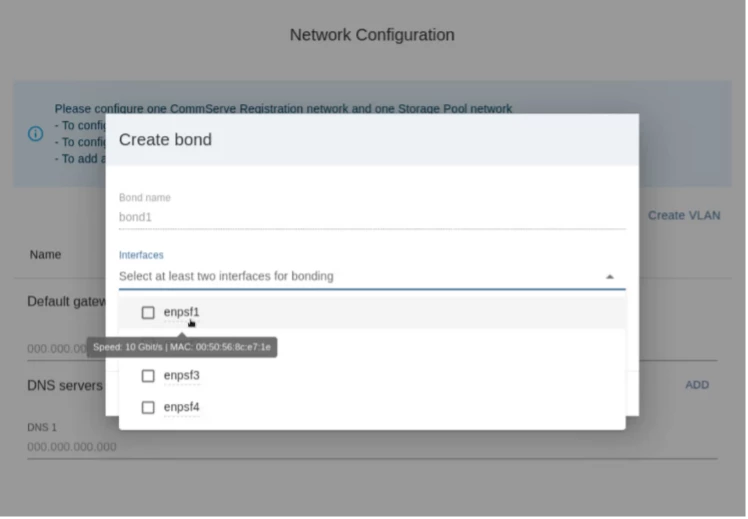
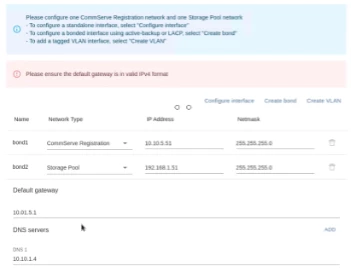
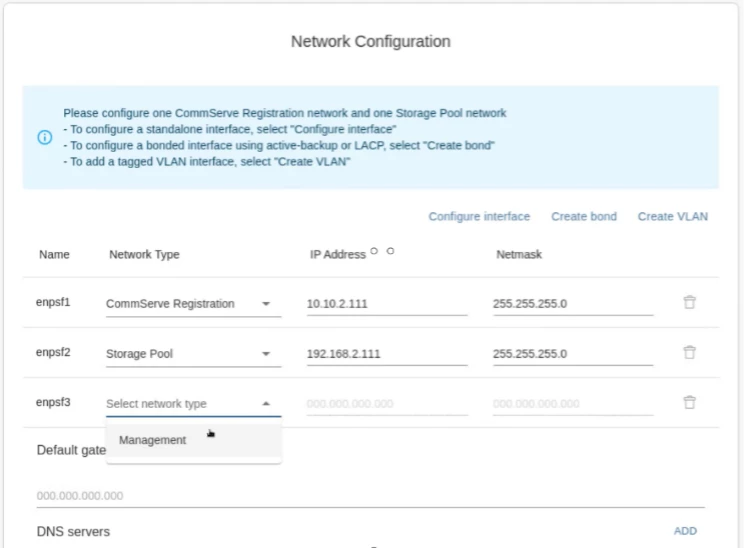
First thing you'll notice is the much-improved network configuration options for creating bonds. On appliances, this is automated for data and storage pool creation. For Reference Architecture, ports will be manually selected (Figure 2). Included in the installer are various toolips, such as MAC address display when hovering (Figure 3) to aid with setting up the correct ports for bonding when working with our customers as they setup their networking.
Faster Time-to-Value
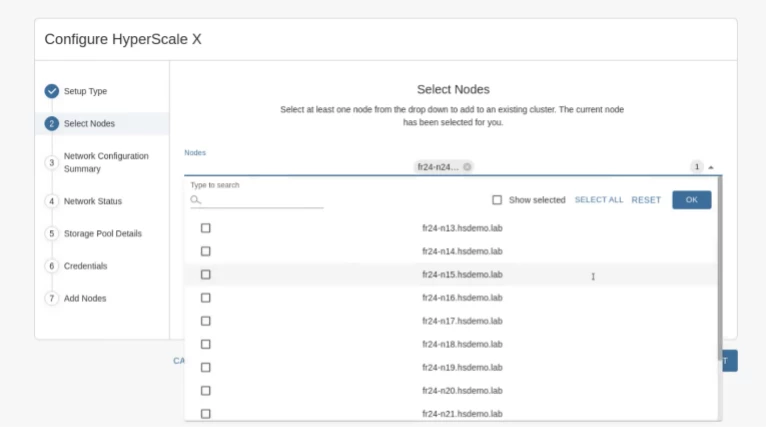
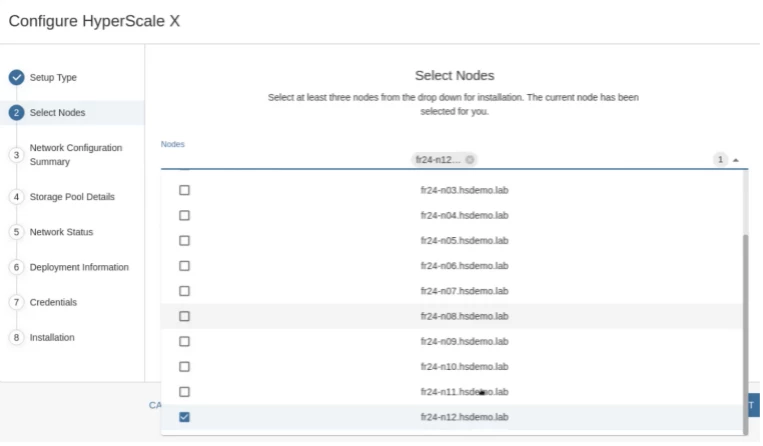
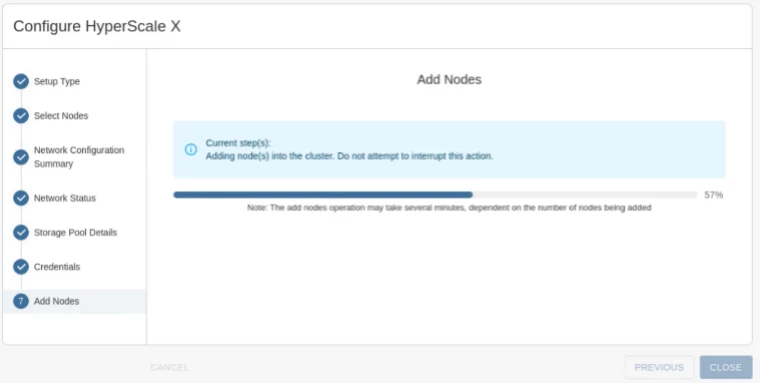
In addition to being more user friendly, the new installer can handle up to twelve nodes at a time for initial installation (Figure 4). For expansion, the old workflow is gone, and again twelve nodes is the maximum supported limit (Figure 5). This makes the installation and configuration time an order of magnitude faster for larger deployments. In the event that something goes wrong, error messaging is greatly improved as well (Figure 6), so less time will be spent troubleshooting.
Bringing Consistency to the Experience
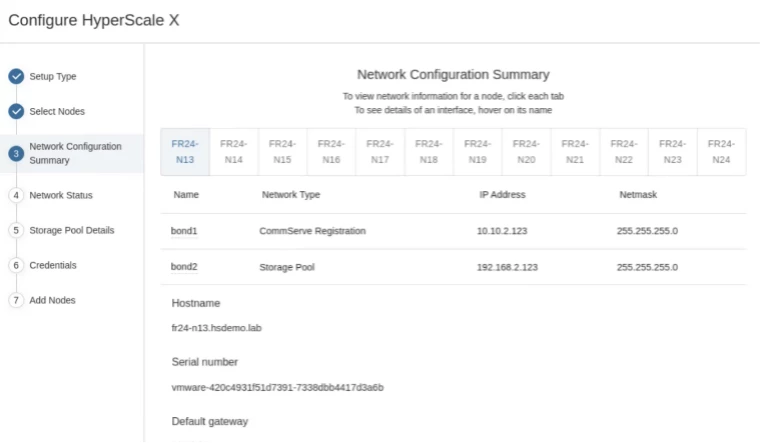
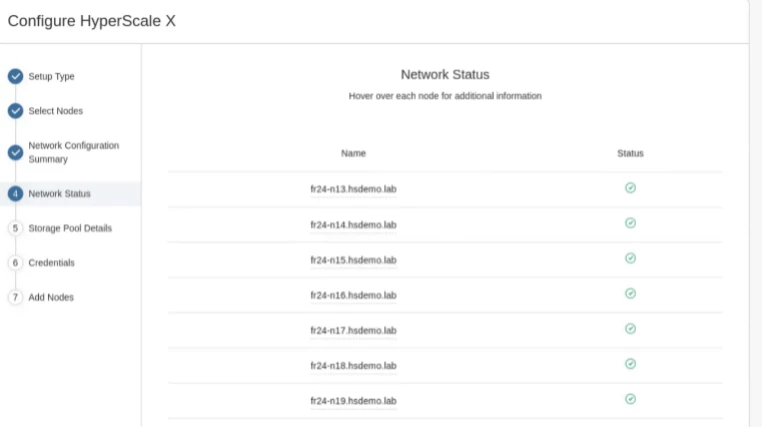
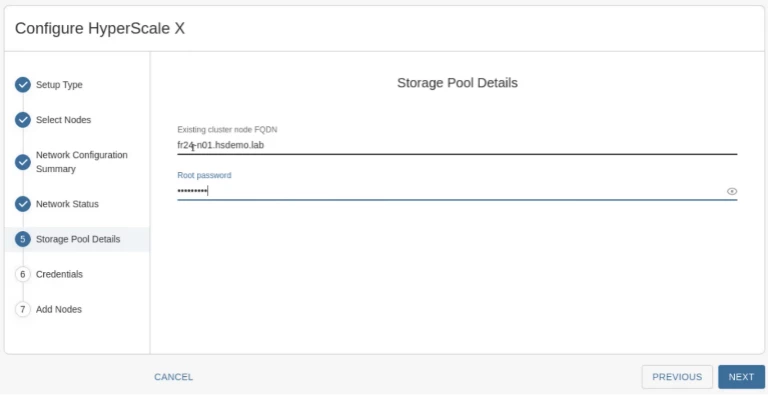
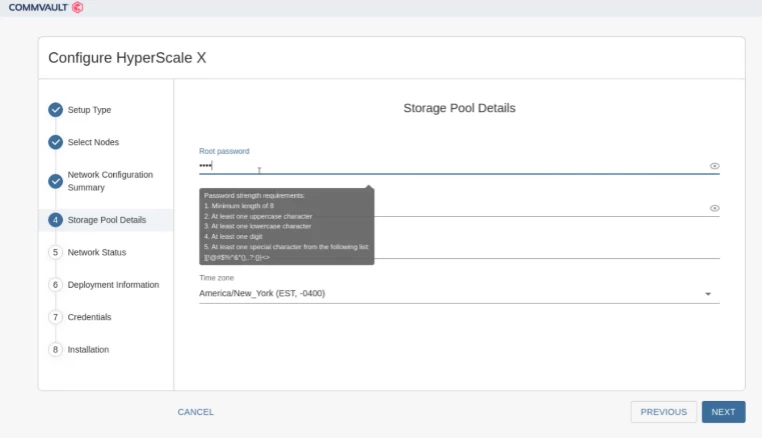
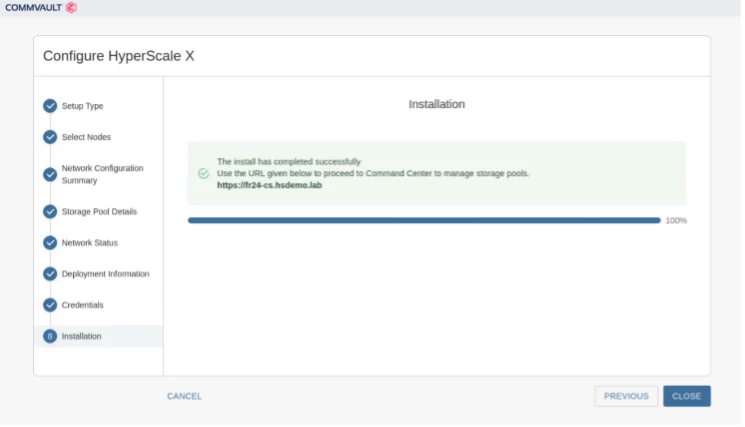
Additional quality-of-life improvements are summary screens to correct any misconfigured networks (Figure 7), final network checks to ensure consistency and compatibility across all nodes (Figure 8), password complexity is enforced and has a peek option (Figures 9 & 10), and better updates on the steps happening during install (Figured 11).
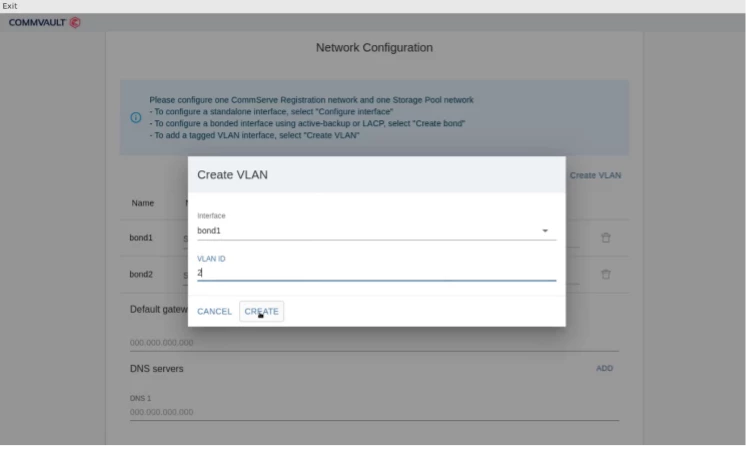
The installer updates also make it easy to configure all options we support, including VLANs (Figure 12) and management (Figure 13) networks.
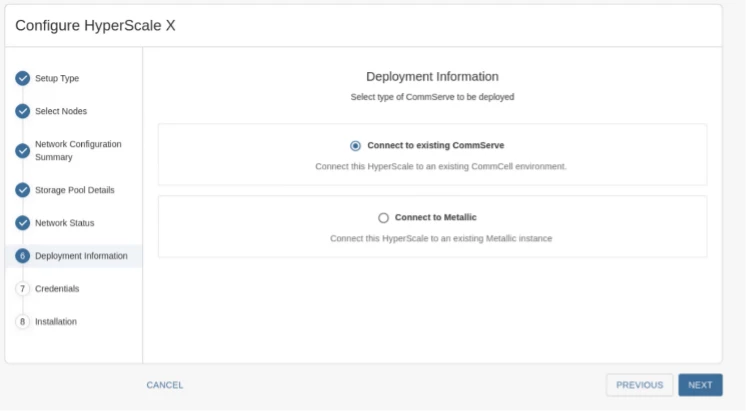
Docking to Metallic is now integrated into the installer (Figure 14). Regardless of which type of Commserve docking you choose, you should be all set for success (Figure 15).
Next Steps
This is the first step in a series of planned quality-of-life, ease-of-use, and general enhancements coming for HSX. Our engineering team has been working overtime with our UX team to bring consistency to all of our processes, dashboards, and user interfaces. As part of this, we're looking at reducing the steps we ask customers to take, automating more discovery and configuration, and improving dashboards.
As part of this process, we're engaging with the field, support, and most importantly, our customers. Be sure to check back here for future installments to come in this series on improved HSX security features.