Introduction
As a part of backup infrastructure implementation, using GCP (Google Cloud Platform) shared VPC’s (Virtual Private Cloud) to come up with multi-NIC media agent setup for CommVault infrastructure. This opened doors to backup data from one tier and restore the same across another tier. This has reduced the overall time and cost to migrate data to a separate client over the GCP network. It also ensured that there is network isolation between production and non-production tiers as no additional firewall ports had to be opened to transfer the backups.
Media agent in GCP with two VPC’s
Below is the screenshot from GCP console which shows Commvault media agent has two NIC’s associated with different subnets from two separate shared VPC’s.
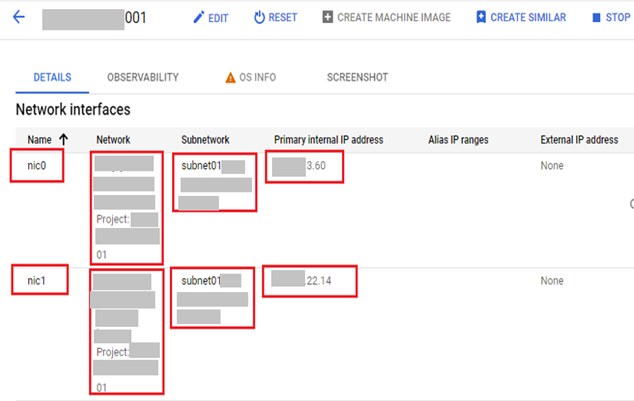
Restore using Commvault multi-NIC media agent
Below is a high level diagram showing the refresh between production and non-production tiers (segregated across VPC’s) by using Multi-NIC media agent. Media agent will read data from storage bucket by using production interface and restore it to required client by using non-production interface.
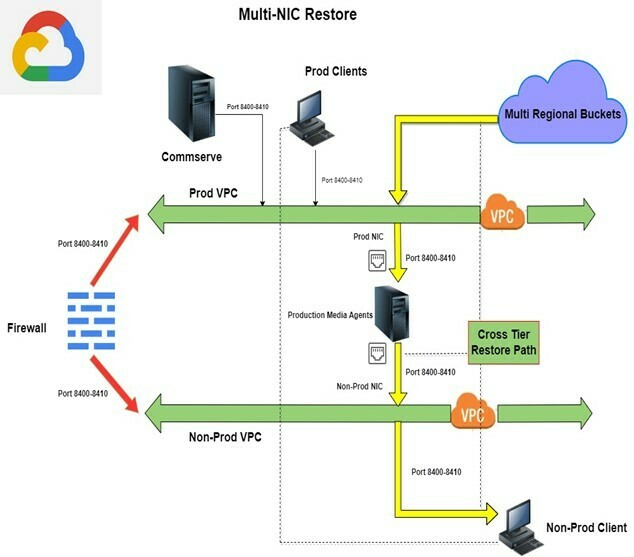
restore required backup across tier using Multi- NIC Media agent
Once you finalize the backup you want to restore, get the details of source and destination clients.
| Source Client | Source zone | Destination client | Destination zone | Media agent |
| hostnamesrc001 | west1-b | hostnmaedst003 | west1-d | hostnamema001 |
steps to configure DIP (Data Interface pairs) and restore
Once you finalize the backup to be restored by browsing job history.
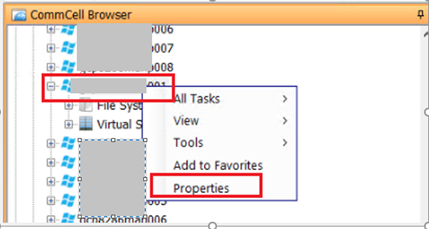
Go to Commvault select media agent from the media agent group using which you are going to restore the backup.
Once you select media agent, right click on media agent.
Click on Properties.
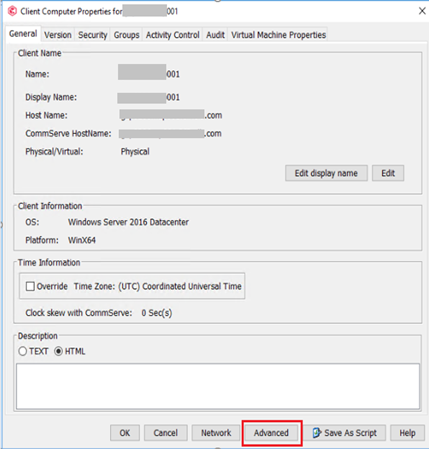
Click on Advanced.
Click on Job Configuration.
Under the backup Networks Click add.
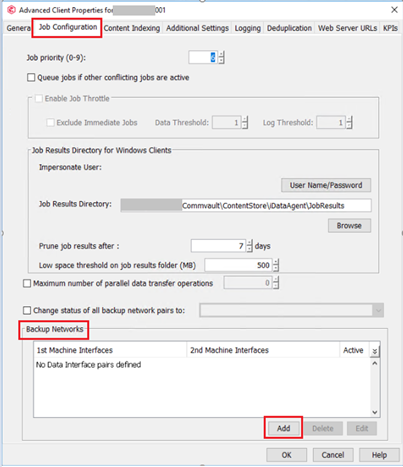
Backup Network Wizard will open.
Select 1st computer will by default pick up the associated media agent.
For 2nd computer select “hostnamedst003” hostname from the list.
Click next.
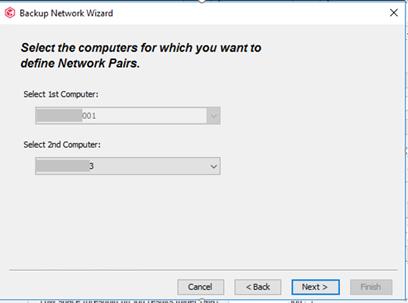
Click on Add button.
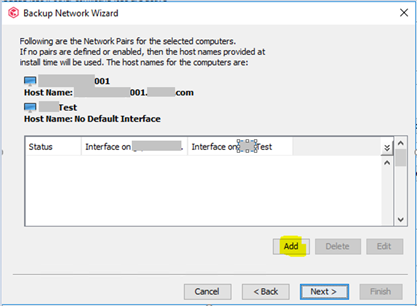
From drop down option select non-production interface IP of media agent.
Here xx.xx.22.14 is nic1 IP.
Also select client interface where you need to restore the backup xx.xx.19.42
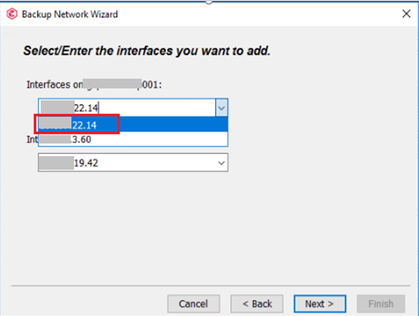
Click next
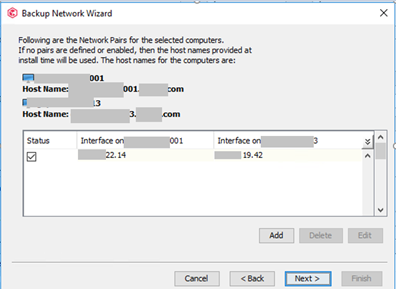
Click Finish and Select No to add another network pairs as we are performing single restore.
Click OK to commit the settings.
To start the restore process select backup to be restored.
Right click to the backup job.
Click on Browse and Restore.
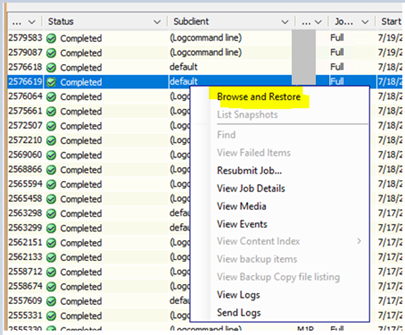
Browse and Restore option window will open.
go to advance option.
Select media agent on which we have added DIP.
Click on view content.
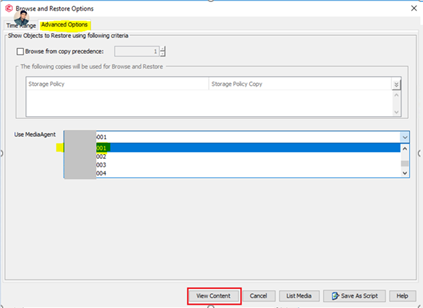
New window will open to view inside details.
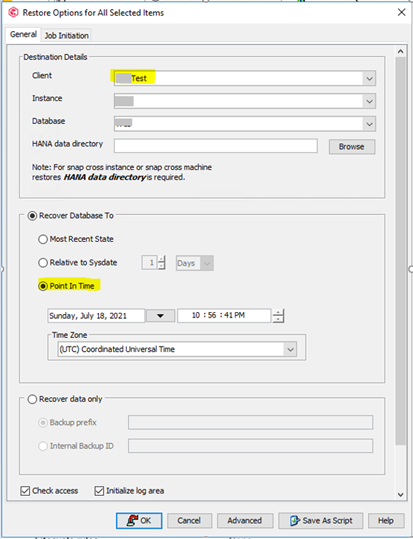
Then select client click on “recover all Selected”.
New restore option window will open with default client selection.
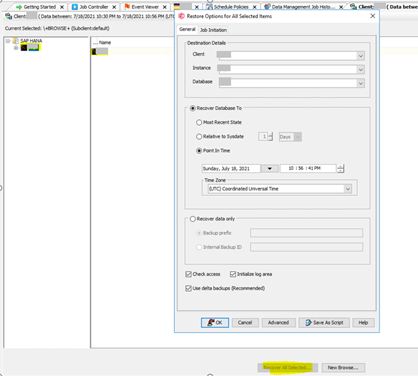
Populate the required details.
Select Point In Time option.
Click ok to start restore.
Reference links
| https://documentation.commvault.com/11.24/expert/22387_sap_hana_restores.html |
| https://documentation.commvault.com/11.24/expert/12914_browsing_and_restoring_using_mediaagent.html |

